

How to install composite decking
Every figure here comes from our own manufacturer guide, so the joist centres, expansion gaps and screw sizes are the ones your boards are made for. Read it through before you order your subframe.
Step 1
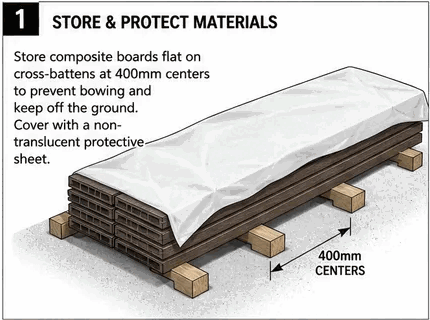
Store the boards flat
If the boards are waiting to be laid, stack them flat on battens at no more than 400mm centres. That stops them bowing, keeps them out of standing water and avoids scratching. Cover them if they are stored outside, with something non-translucent.
Step 2
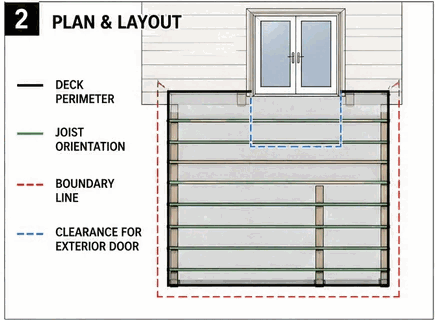
Plan the deck before you cut anything
The size, shape and orientation decide where your joists run, so settle them first. Pay attention to boundaries and to any door that opens onto the deck, as both limit your layout.
Step 3
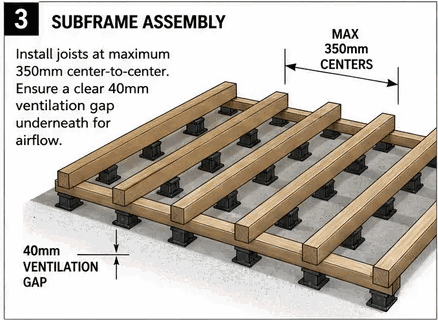
Build the subframe
Never lay these boards without a subframe. Timber, metal or composite all work. Joist centres must be no more than 350mm, and you need to leave a 40mm space beneath the subframe so air can move under the deck.
Step 4
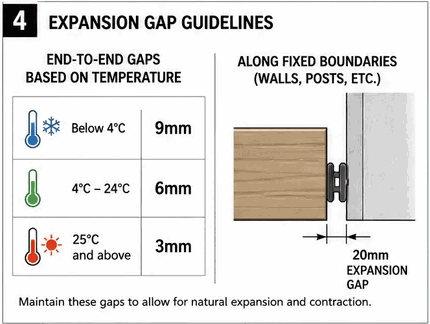
Set your expansion gaps
Composite expands and contracts with temperature, so the gap depends on the day you fit it. Below 4C leave 9mm end to end, between 4C and 24C leave 6mm, and at 25C or above leave 3mm. Keep at least 20mm from any fixed boundary such as a wall.
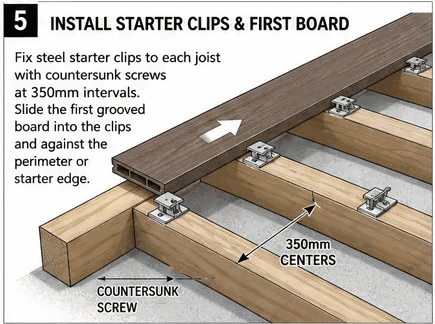
Step 5
Fix the starter clips
Work from the outside edge. Screw starter clips to the edge of the frame with the steel screws supplied, one every 350mm along the joist. Countersinking helps the screws sit flush. Clip your first board in.
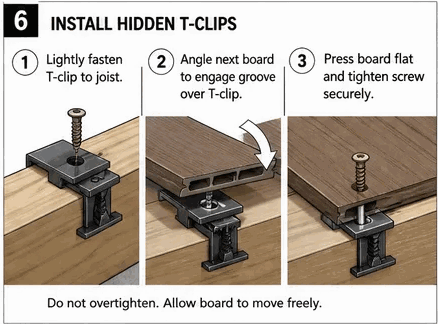
Step 6
Clip and screw board by board
Lightly screw a T-clip in without tightening, place the next board against it, and lift the board edge slightly to slide it home. Check the board touches the clips along its whole length, then tighten fully. Repeat until you reach the last two boards.
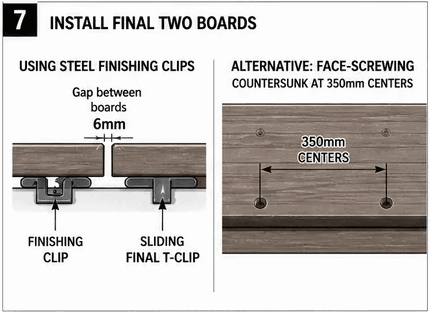
Step 7
Finish the last two boards
Measure the last two boards with a 6mm gap between them and mark your joists, then fit steel finishing clips and clip the final board in. Slide the remaining T-clips down and screw them to the joists. If access will not allow it, screw the last board at an angle every 350mm instead and do not over-tighten, or the board will split.
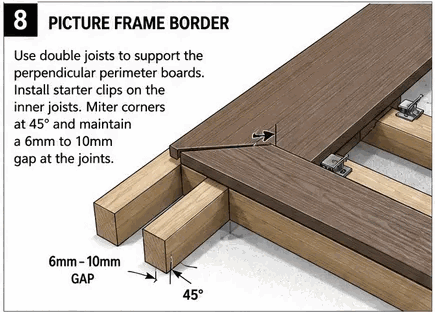
Step 8
Picture frame border, if you want one
Where the border runs perpendicular to the main deck, it needs a double joist under every side. Fit starter clips on the inner joists to hold the inner board edge, slide the board in, then screw the outer edge. Keep the same 6mm to 10mm expansion gap between the mitred edges.
Step 9
Fit the edging and corner trim
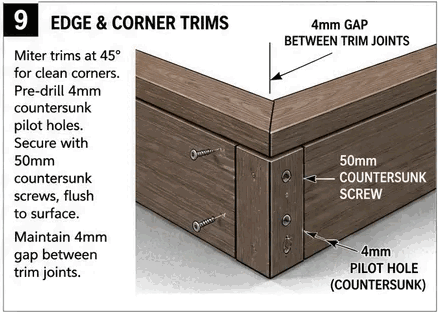
Cut the trim to length, mitring the ends at 45 degrees around corners. Pre-drill 4mm countersunk pilot holes and fix with 50mm countersunk screws, finishing by hand so you do not overdrive them. Corner trims screw into the deck only, and need a 4mm gap where their ends meet.
Step 10
Building steps
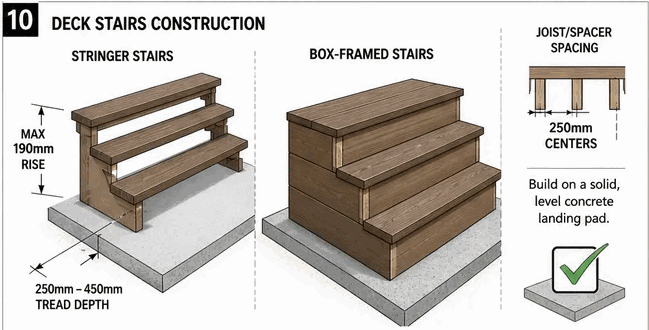
Keep the rise no more than 190mm and the tread between 250mm and 450mm, consistent the whole way up, on a solid concrete or gravel landing pad. Stringer steps span from the subframe to the base. Box-framed steps stack boxes with joists at 250mm spacings, fixed to the subframe at every intersection.
Step 11
Allow for the colour to settle
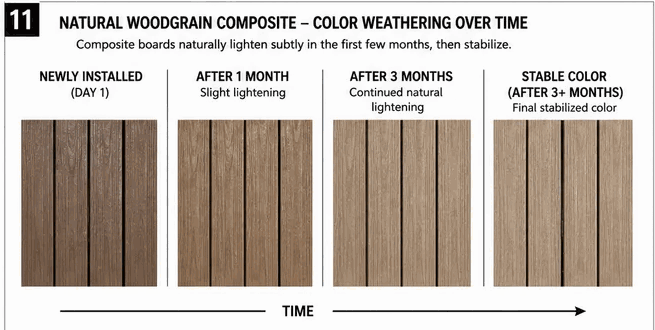
Expect an initial fade back over the first three months as tannins in the wood react to the weather. After that the colour barely moves. Trims and boards can differ slightly during that period, particularly on the woodgrain face.